If you want to add in-app subscriptions to your SwiftUI app, RevenueCat is one of the easiest ways to do it.
In this example, we’ll walk through setting up a freemium model where users can use our app’s core features for free and subscribe to unlock premium features at either $3.99 per month or $19.99 per year.
Before we jump into RevenueCat, we need to set up our subscription options in App Store Connect so that RevenueCat can link purchases correctly.
Set Up Subscriptions in App Store Connect
Open App Store Connect and select your app. On the left pane, navigate to Monetization -> Subscriptions.
You should be looking at this screen:
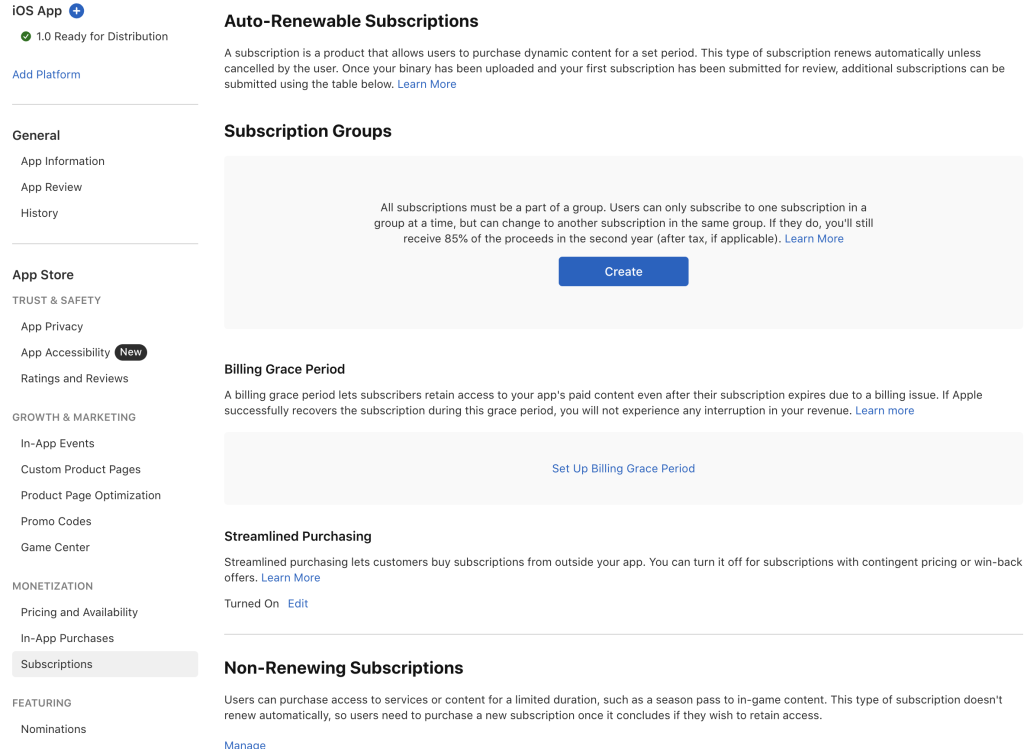
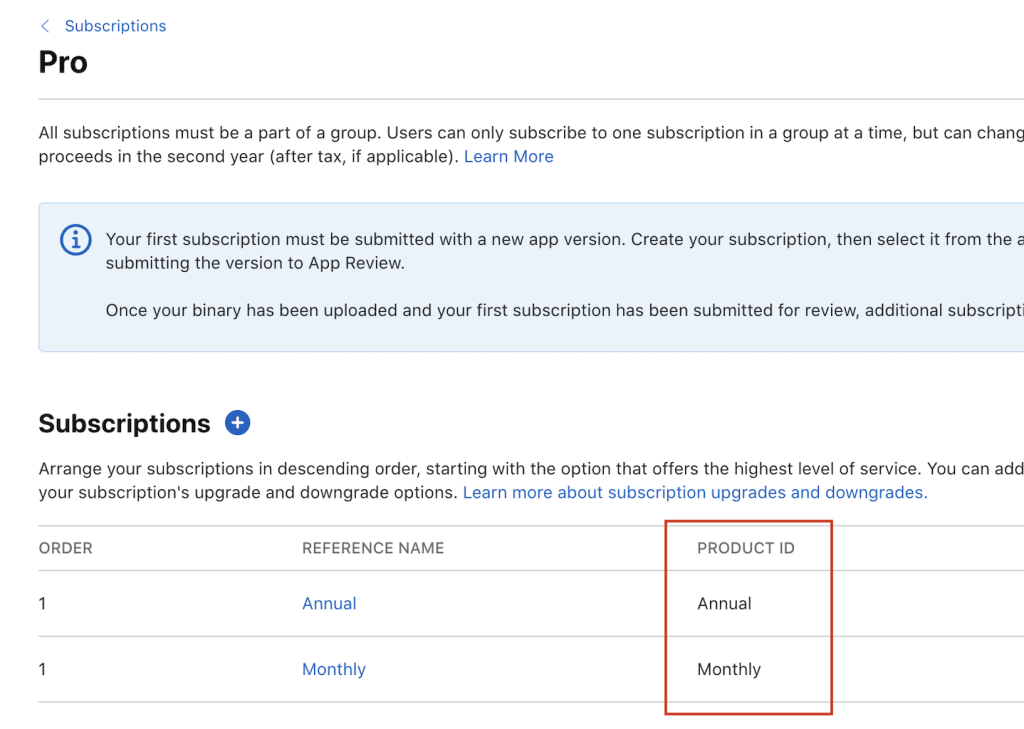
Click the “Create” button to create a subscription group. We’ll call this group “Pro”.
Note: We’re only creating one subscription group. This helps prevent duplicate purchases since users can only have one active subscription per group.
Next, we’ll add two subscriptions in the “Pro” subscription group: one called “Monthly” and the other called “Annual.”

Scroll down to the Availability section and select all countries, since this app is available worldwide.
Then, in the Subscription Prices section, we’ll enter our pricing in USD. Apple will handle converting it for each country automatically.
For a deeper dive into subscription options, policies, and best practices, head over to Apple’s Developer website here. It covers everything beyond basic setup.
Set Up Products, Entitlements, and Offerings in RevenueCat
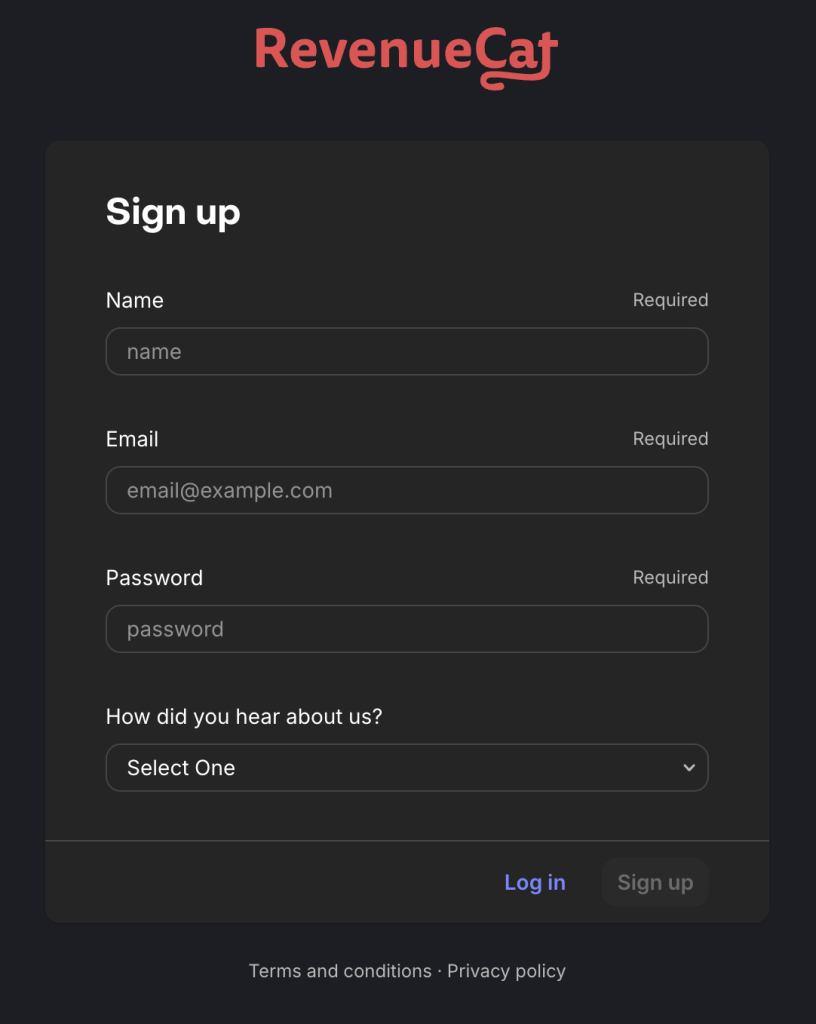
If you haven’t already, head to Revenue Cat’s website and create a free account.
Select the first option here and follow the steps.
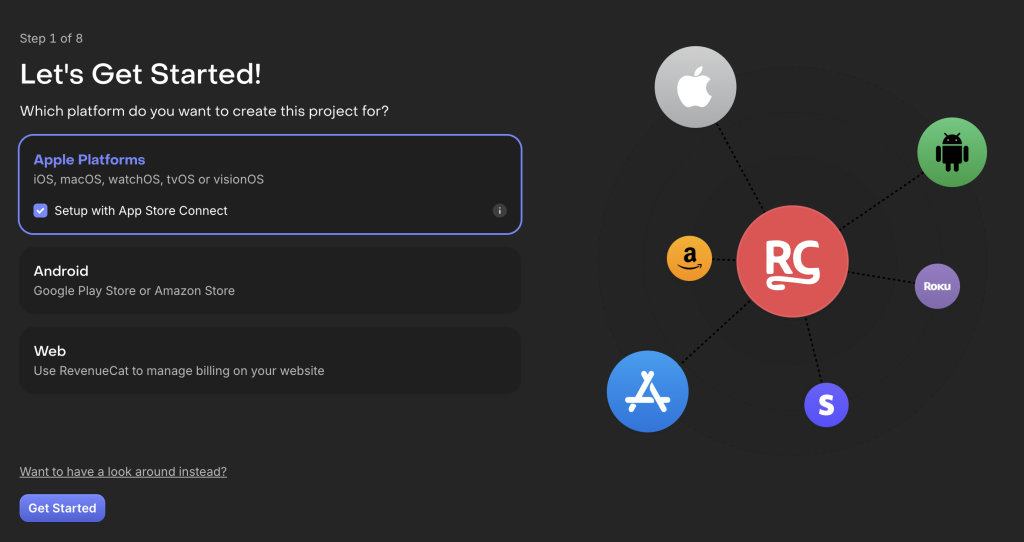
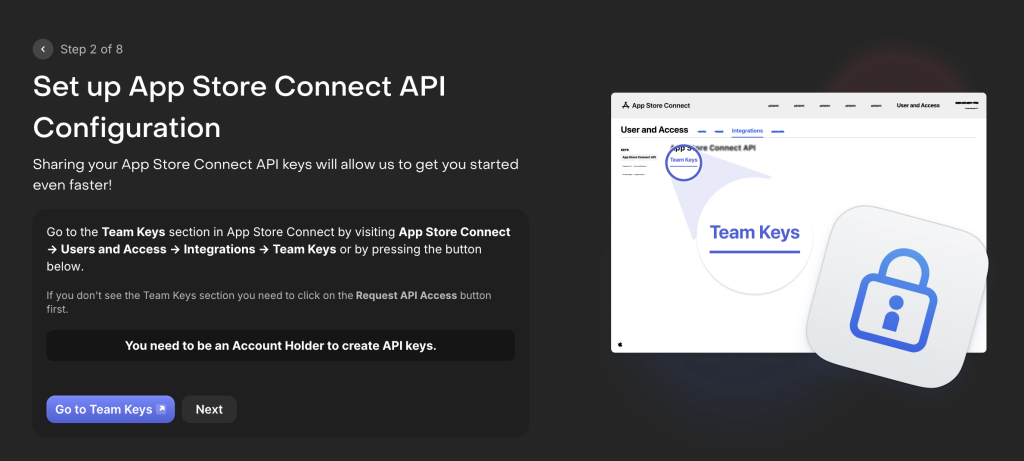
RevenueCat will walk you through the initial setup.
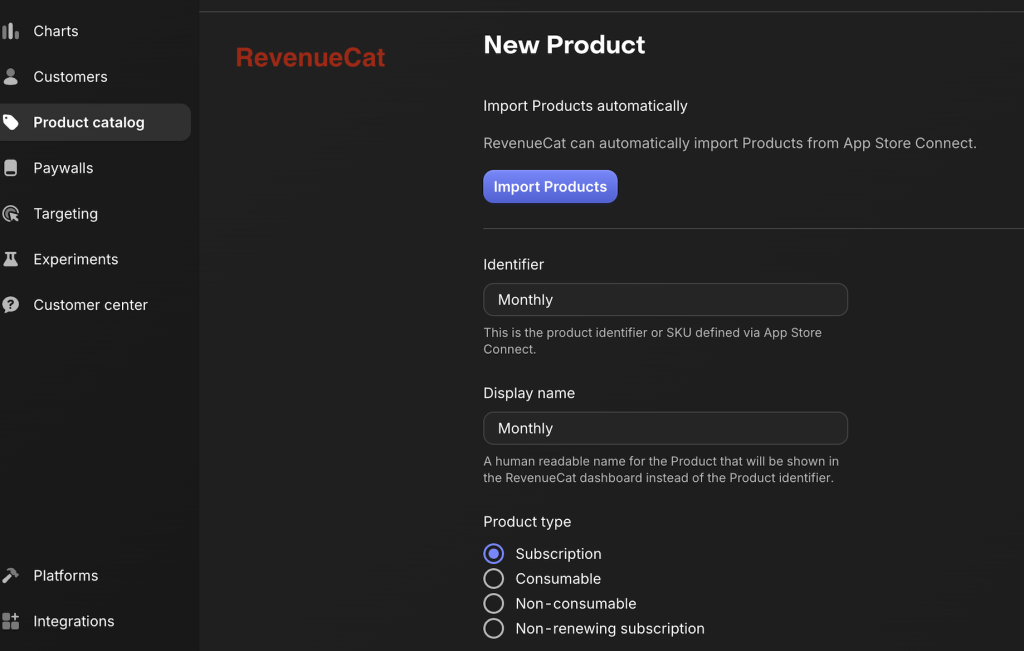
Add your products by going to Product Catalog -> Products in RevenueCat. Click + New Product, and copy/paste your ProductIDs from App Store Connect in the Identifier field in RevenueCat.
You’ll also create an Entitlement, which is what RevenueCat uses to determine what level of access a user has. In our example, we use “Pro” for the entitlement name.
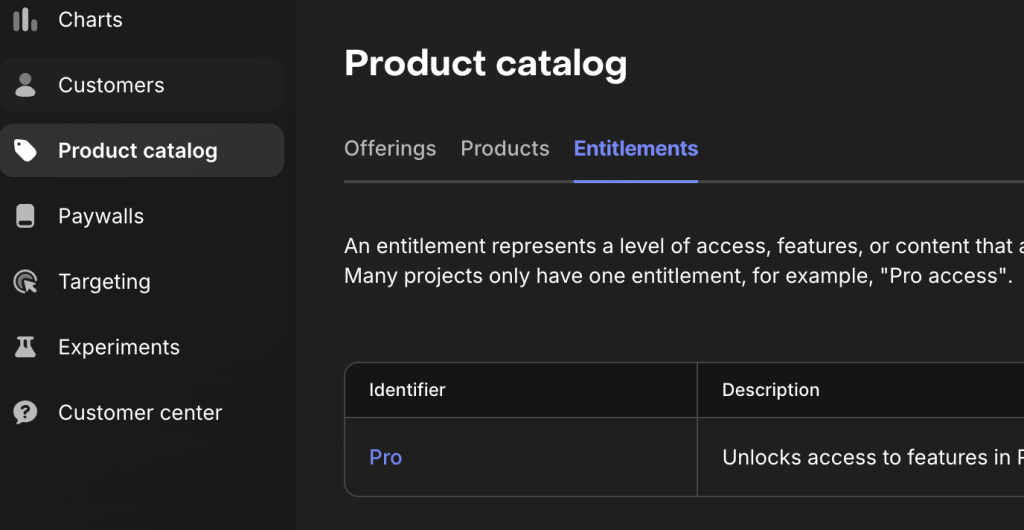
Note: The entitlement name “Pro” happens to match our subscription group name in App Store Connect, but it doesn’t have to. If your app has different feature levels, you could create a “Silver” entitlement and “Gold” entitlement, for example.
Once you’ve created the entitlement, select the Entitlement ID and attach the products to it.
Finally, we’ll set up an “Offering”. This is the set of products that a user will be presented with on a paywall.
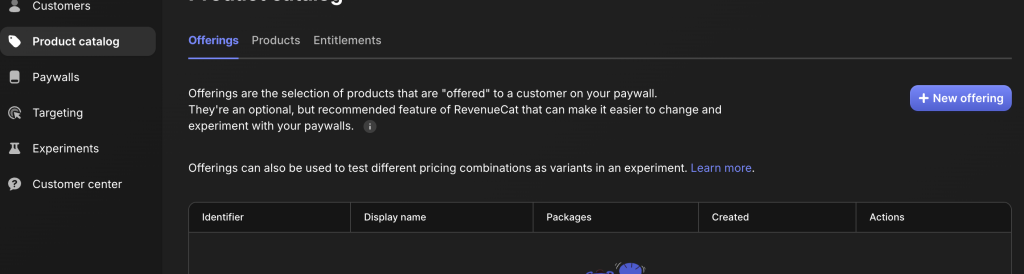
Here, we’ll create one offering called “default”. Then, we’ll create two packages in the offering, one for monthly, and one for annual. And, you guessed it, we’ll add the monthly product to the monthly package, and the annual product to the annual package.
Update Your XCode Project
Now that we’ve set up our subscriptions in App Store Connect and our products, entitlements, and offerings are configured in RevenueCat, we’re ready to update our XCode project.
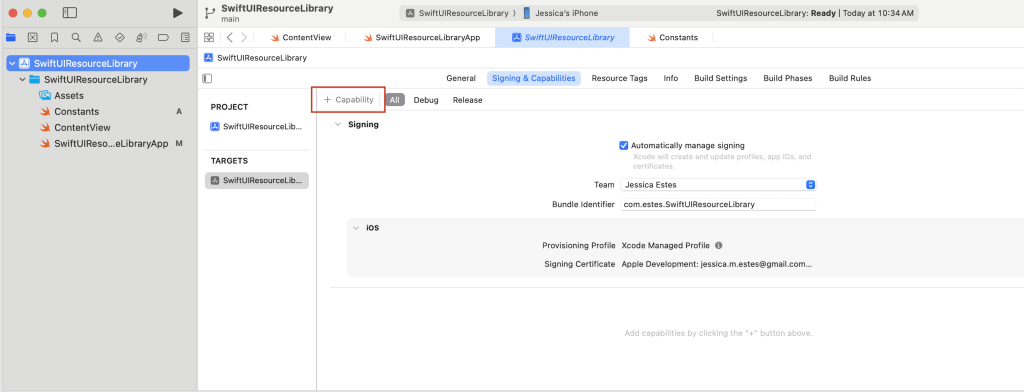
Add In-App Purchases to Signing & Capabilities
Navigate to your App’s Target and select “Signing & Capabilities”. It will look something like this. Here, we’ll select “+ Capability”:
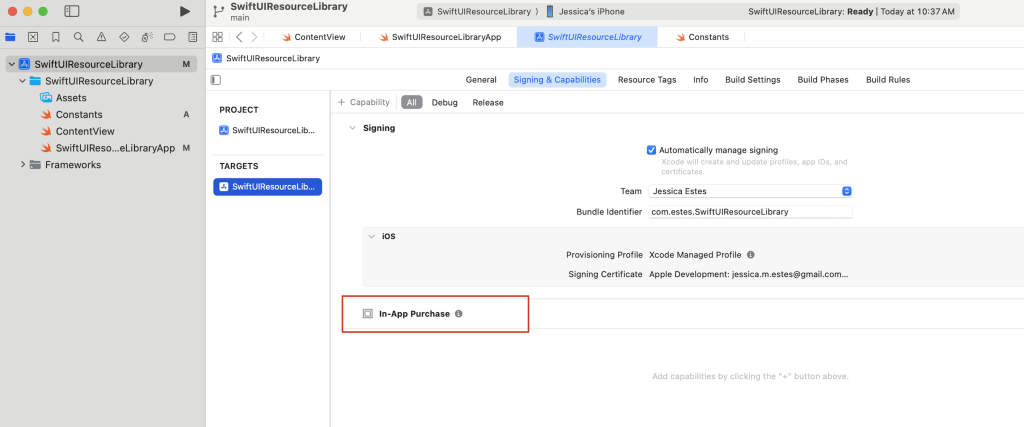
Select “In-App Purchase”. Now, you’ll see it on the screen:
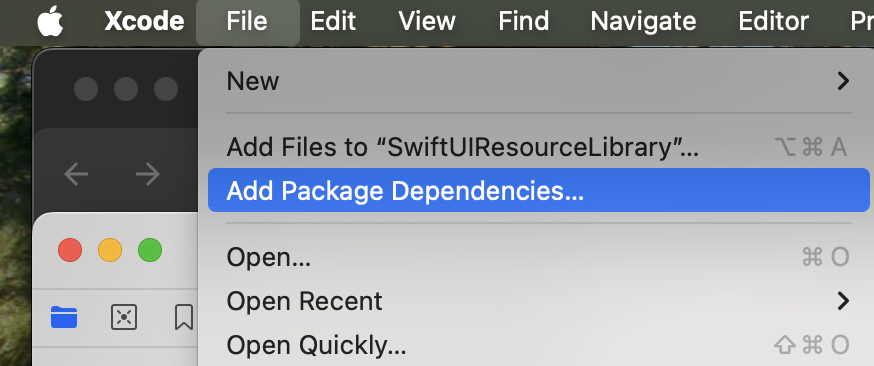
Import the RevenueCat SDK
Open your XCode project and go to File -> Add Package Dependencies.
In the “Search or Enter Package URL” field, enter https://github.com/RevenueCat/purchases-ios

Make sure the Dependency Rule says “Up to Next Major Version” and not “Branch”. Then select “Add Package”.
Only select RevenueCat and RevenueCatUI to “Add to Target”.
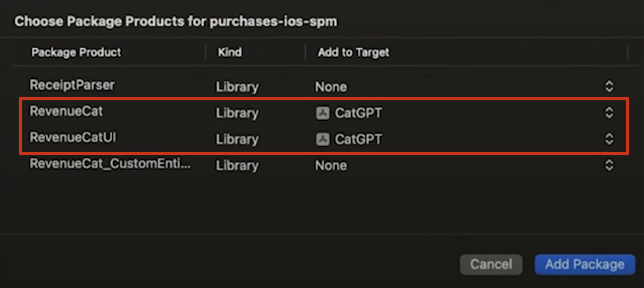
Click “Add Package” again.
Add a Constants File
Create an empty file called “Constants” that will store the RevenueCat API key and Entitlement ID.
Copy/paste this code in your Constants.swift file. Then, replace the API key and Entitlement ID with your unique IDs from RevenueCat.
//Constants.swift
import Foundation
//Configuration file for your app's RevenueCat settings.
struct Constants {
static let apiKey = "Paste your API key here"
static let entitlementId = "Paste your Entitlement ID here"
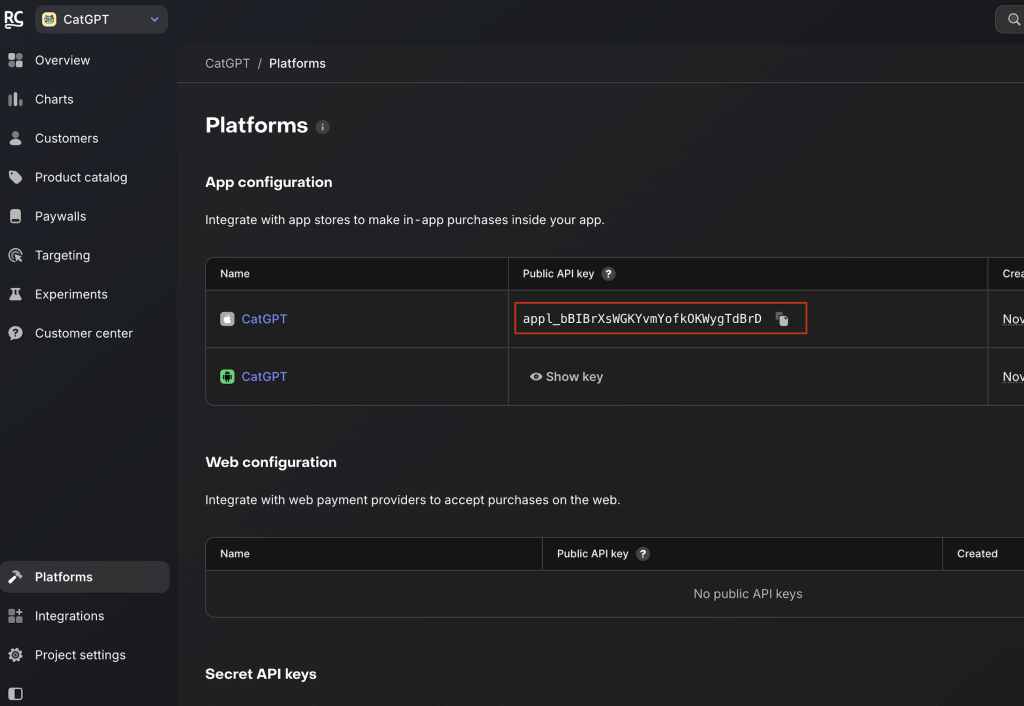
}How to Find Your RevenueCat API Key
You can find your RevenueCat API Key by selecting Platforms on the left menu pane and then copying the API key listed in the App Configuration section. Copy this key and paste it in the Constants.Swift file.
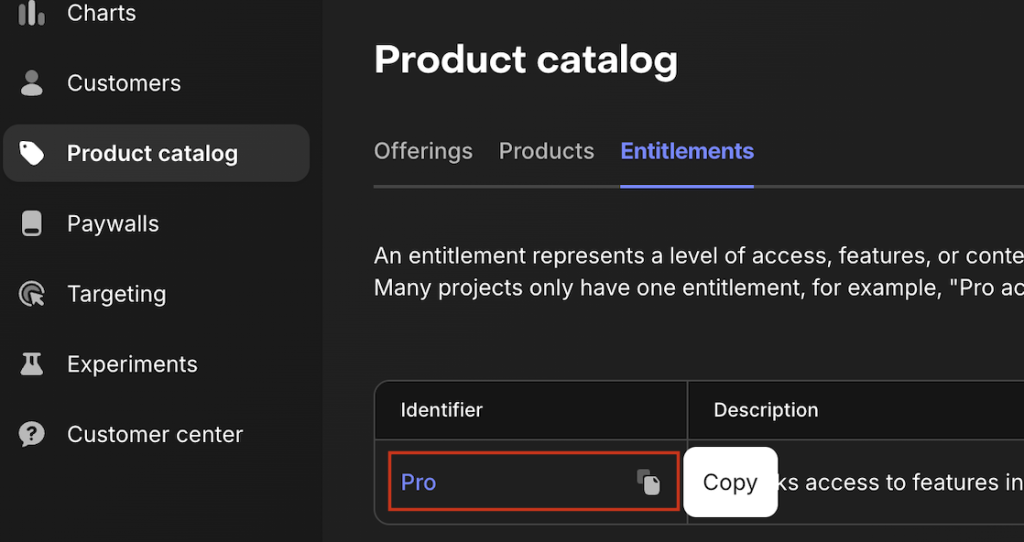
How to Find Your Entitlement ID
In the RevenueCat Dashboard, head over to Product Catalog -> Entitlements. Copy/paste the identifier.
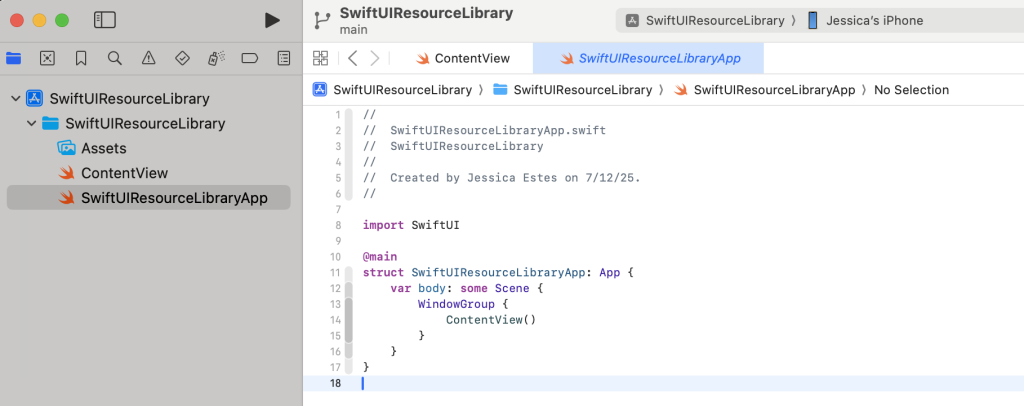
Update Your App Entry Point File
Your app entry point file is automatically created when you create a new SwiftUI project. By default, it’s named using the format YourProjectNameApp.swift and contains “@main”. Navigate to this file in your Xcode project.
Here, we’ll add a delegate handler so that our app can respond to real-time updates from RevenueCat (like when a user’s subscription status changes).
- Add “import RevenueCat”
- In the main struct folder, create an init(). This is where RevenueCat gets configured. We’ll add the following to the init():
- A log level to debug and add messages to our console
- A purchases configuration to a builder using your API
- Make sure we’re using StoreKit2
- A purchases.shared delegate so our app can react to changes on the RevenueCat server
Your code will look like this:
import SwiftUI
import RevenueCat

@main
struct SwiftUIResourceLibraryApp: App {

    init () {
        Purchases.logLevel = .debug
        Purchases.configure(
            with: Configuration.Builder(withAPIKey: Constants.apiKey)
                .with(storeKitVersion: StoreKitVersion.storeKit2)
                .build()
        )

        Purchases.shared.delegate = PurchasesDelegateHandler.shared
    }

    var body: some Scene {
        WindowGroup {
            ContentView()
        }
    }
}
Note: You’ll see an error message after adding these. This will resolve once the other steps are complete.
Create a PurchasesDelegateHandler File
//
//  PurchasesDelegateHandler.swift
//  RoundabeatMetronome
//
//  Created by Jessica Estes on 7/13/25.
//

import Foundation
import RevenueCat

class PurchasesDelegateHandler: NSObject, ObservableObject {
    static let shared = PurchasesDelegateHandler()
}

extension PurchasesDelegateHandler: PurchasesDelegate {
    func purchases(_purchases: Purchases, receivedUpdated customerInfo: CustomerInfo) {
        UserViewModel.shared.customerInfo = customerInfo
    }
}
Leave a Reply